Error 720
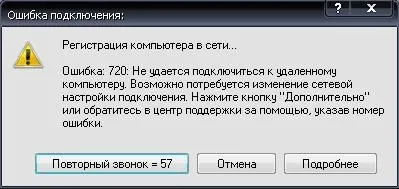
Resident 720 error occurs in certain cases: when the computer ∕ laptop was attacked and infected and then cleaned by several antivirus programs at once; when the operating system is outdated (without long updating) or as a result of PPTP protocols wrong setting.
Error 720 when connecting the Internet - what to do?
Don't panic, act! Our detailed manual will help you!- First of all let's try to rollback the OS using System Restore. Start → Accessories → System Restore. In the new window, click on "Restore an earlier state of your computer" and click Next. On the calendar that appears, choose the closest point to today and click Next again. That should stop ERROR 720 from showing up.
- If that doesn't work, you can reset the networking to factory defaults. In the command line, enter the following commands in turn:netsh int ip reset resetlog.txt
netsh winsock reset
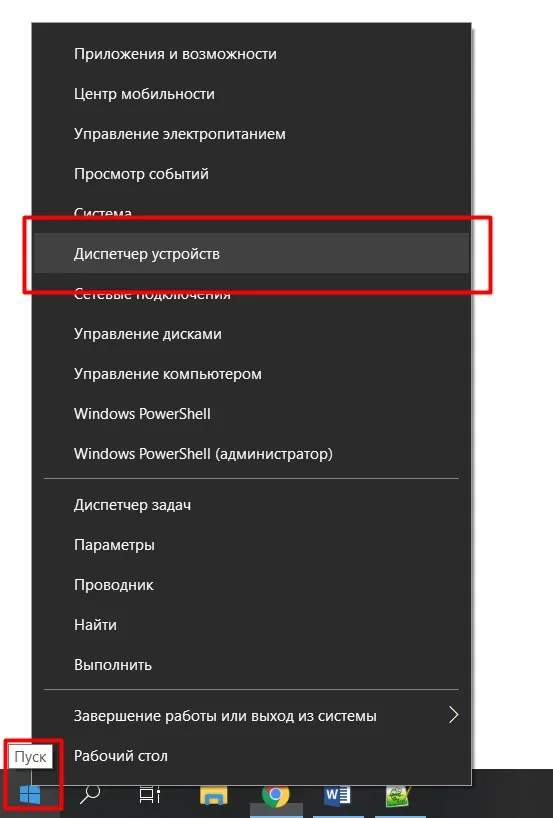
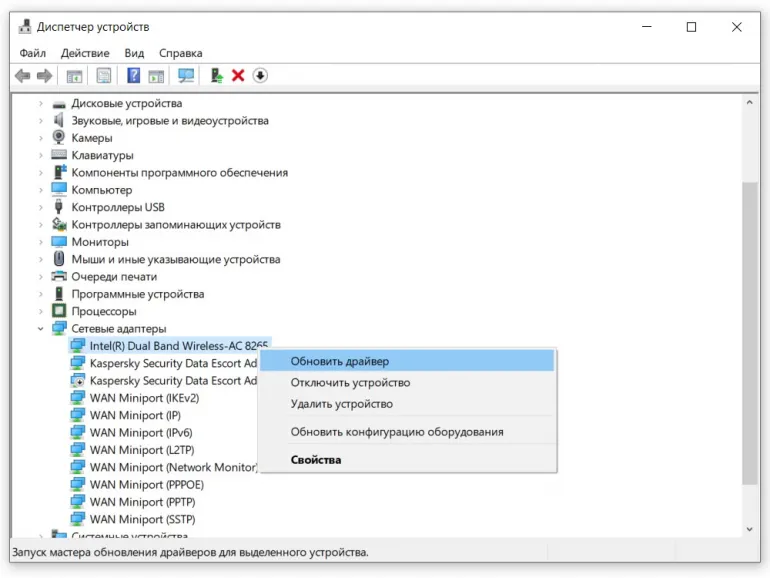
Reboot the device. - It does not hurt to check the network card drivers (if outdated) - download new ones only on official sites! For version Windows 10 screenshots look like this:
![]()
![]()
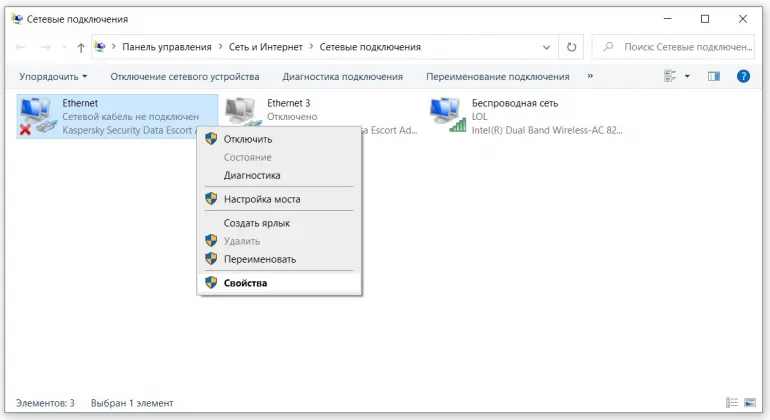
- And the hardest but very effective way to fix error 720 when connecting is to remove TCP/IP. Go first to the "Network and Sharing Center" (Windows taskbar). In the dialog box, find "Network Connections". Right click on "Local Area Connection", go to "Properties":
![]()
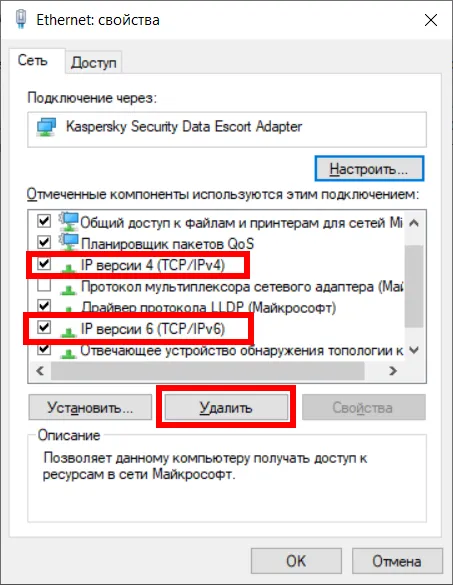
In the "Network" tab find the "Internet Protocol (TCP/IP)", right click on it → "Delete".![]()
Let us follow the instructions of the uninstall wizard. Reboot the device and now we have to add the TCP/IP protocol again. To do this we select the properties of the local connection (see above). Press "Set":![]()
"Protocol" → "Add". Under "Network Protocol" select "Internet Protocol TCP/IP" → "Close" (if we do not find it, select the path C:\Windows\inf).
There is another way - reinstall the mini-port WAN, but it is even more "painful" and complicated. Usually one of the above options will work in 99.9% of cases. We assure you that even at home you can fix 720 error. Don't despair, try it!

